Microsoft Excel에서 VBA를 사용하여 다른 시트에서 인쇄 데이터
이 기사에서는 다른 시트의 데이터를 인쇄하는 매크로를 만듭니다.
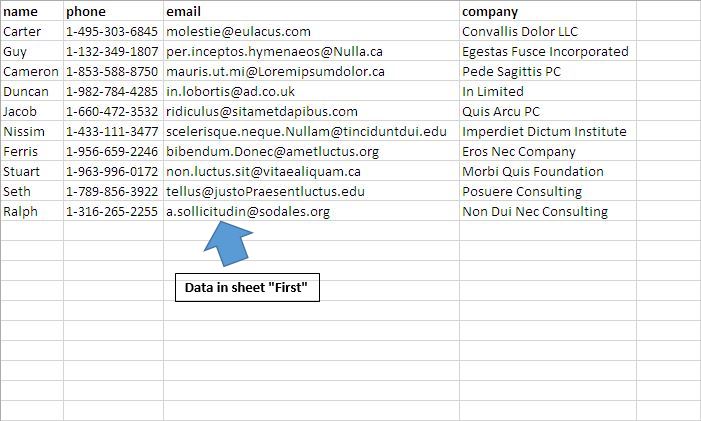
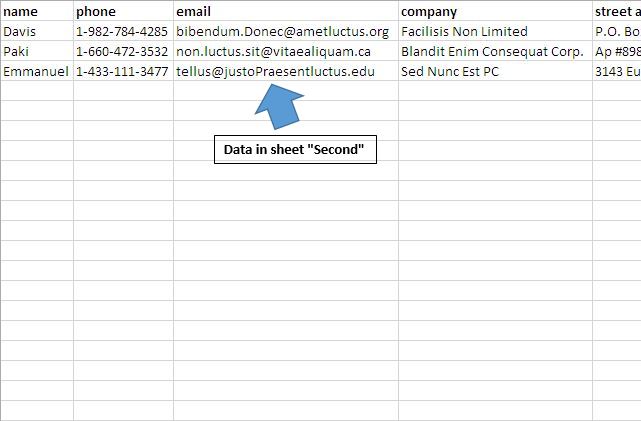
두 장의 시트에 서로 다른 원시 데이터가 있고이 시트의 인쇄물을 사용자 정의하려고합니다.
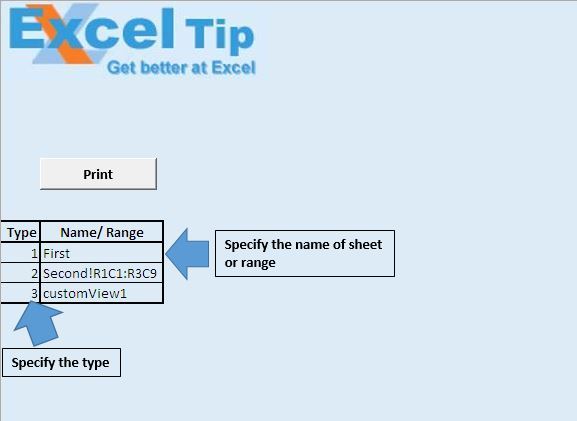
매크로를 실행하기 전에 필요한 인쇄 유형을 지정하고 이름, 범위 또는 사용자 정의보기를 지정해야합니다.
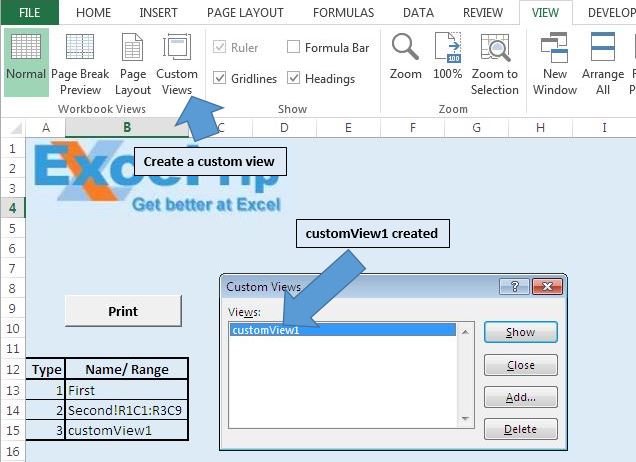
사용자 정의보기 “customView1″을 만들었습니다.
논리 설명
맞춤 인쇄를 위해 “PrintReports”매크로를 만들었습니다. 이 매크로는 A13 셀부터 마지막 행까지 반복됩니다. 맞춤형 인쇄를 위해 세 가지 유형을 지정할 수 있습니다.
유형 1의 경우 다음 열에 시트 이름을 지정해야합니다.
유형 2의 경우 인쇄 할 범위를 지정해야합니다.
유형 3의 경우 사용자 정의보기의 이름을 지정해야합니다.
코드 설명
범위 내의 각 Cell1 ( “A13”, ActiveCell.End (xlDown))
위의 코드는 A13 셀에서 마지막 행까지 반복하는 데 사용됩니다.
DefinedName = ActiveCell.Offset (0, 1) .Value 위 코드는 활성 셀의 다음 열에있는 셀에서 값을 가져 오는 데 사용됩니다.
Select Case Cell1.Value Case 1 ‘Selecting the defined sheet Sheets (DefinedName) .Select Case 2’Selecting the defined range Application.Goto Reference : = DefinedName Case 3 ‘Selecting the defined custom view ActiveWorkbook.CustomViews (DefinedName) .Show End Select 위의 Select 문은 사용자가 정의한 유형에 따라 지정된 영역을 선택하는 데 사용됩니다.
ActiveWindow.SelectedSheets.PrintOut 위의 코드는 선택한 영역을 인쇄하는 데 사용됩니다.
아래 코드를 따르세요
Option Explicit

Sub PrintReports()

'Declared variables

Dim DefinedName As String

Dim Cell1 As Range

'Disabling screen updates

Application.ScreenUpdating = False

'Looping through all the cells

For Each Cell1 In Range("A13", ActiveCell.End(xlDown))

Sheets("Main").Activate


'Selecting the cell

Cell1.Select


'Getting value of sheet name or defined range

DefinedName = ActiveCell.Offset(0, 1).Value


Select Case Cell1.Value


Case 1

'Selecting the defined sheet

Sheets(DefinedName).Select

Case 2

'Selecting the defined range

Application.Goto Reference:=DefinedName

Case 3

'Selecting the defined custom view

ActiveWorkbook.CustomViews(DefinedName).Show

End Select


'Printing the required data

ActiveWindow.SelectedSheets.PrintOut


Next

Application.ScreenUpdating = True

End Sub
이 블로그가 마음에 들면 Facebook 및 Facebook에서 친구들과 공유하십시오.
여러분의 의견을 듣고 싶습니다. 작업을 개선하고 더 나은 서비스를 제공 할 수있는 방법을 알려주십시오. [email protected]로 문의 해주세요